How to prevent wheel separations on trucks and trailers
While wheel separations remain statistically rare events, they inconveniently tend to occur in very public places. Most jurisdictions don’t track wheel separations the way Ontario does, making accurate national data hard to come by. Reliable estimates suggest five to 10 incidents occur somewhere in North America every day.
And sometimes innocent people are killed.
A double fatality caused by a wheel separation in 1996 prompted the Ontario government to investigate the causes of these events. That work followed research done by the U.S. National Transportation Safety Board five years earlier, after a rash of wheel separations resulted in seven fatalities.
Ontario’s research, conducted between 1997 and late 2003, was summarized in a 2004 report titled “Wheel Separations from Commercial Vehicles: Experiences in Ontario,” written by Robert Monster. Those findings remain relevant today. When asked why Ontario has not continued researching wheel separations, an MTO official told trucknews.com, “There isn’t anything new to learn.”
Monster’s work, along with a Transport Canada paper published around the same time, “Heavy Truck Wheel Separations: Exploring the Causes,” identified improper or inadequate maintenance as the principal underlying factor in nearly all wheel separations.
Based on 750 separation investigations, Ontario’s Ministry of Transportation found:
- More than 80% resulted from failed fasteners
- Failed bearings accounted for roughly 10–15%
- Fastener-related separations often occurred shortly after wheel-end maintenance
- Trailers are more than twice as likely as tractors to lose a wheel
Why do fasteners fail?
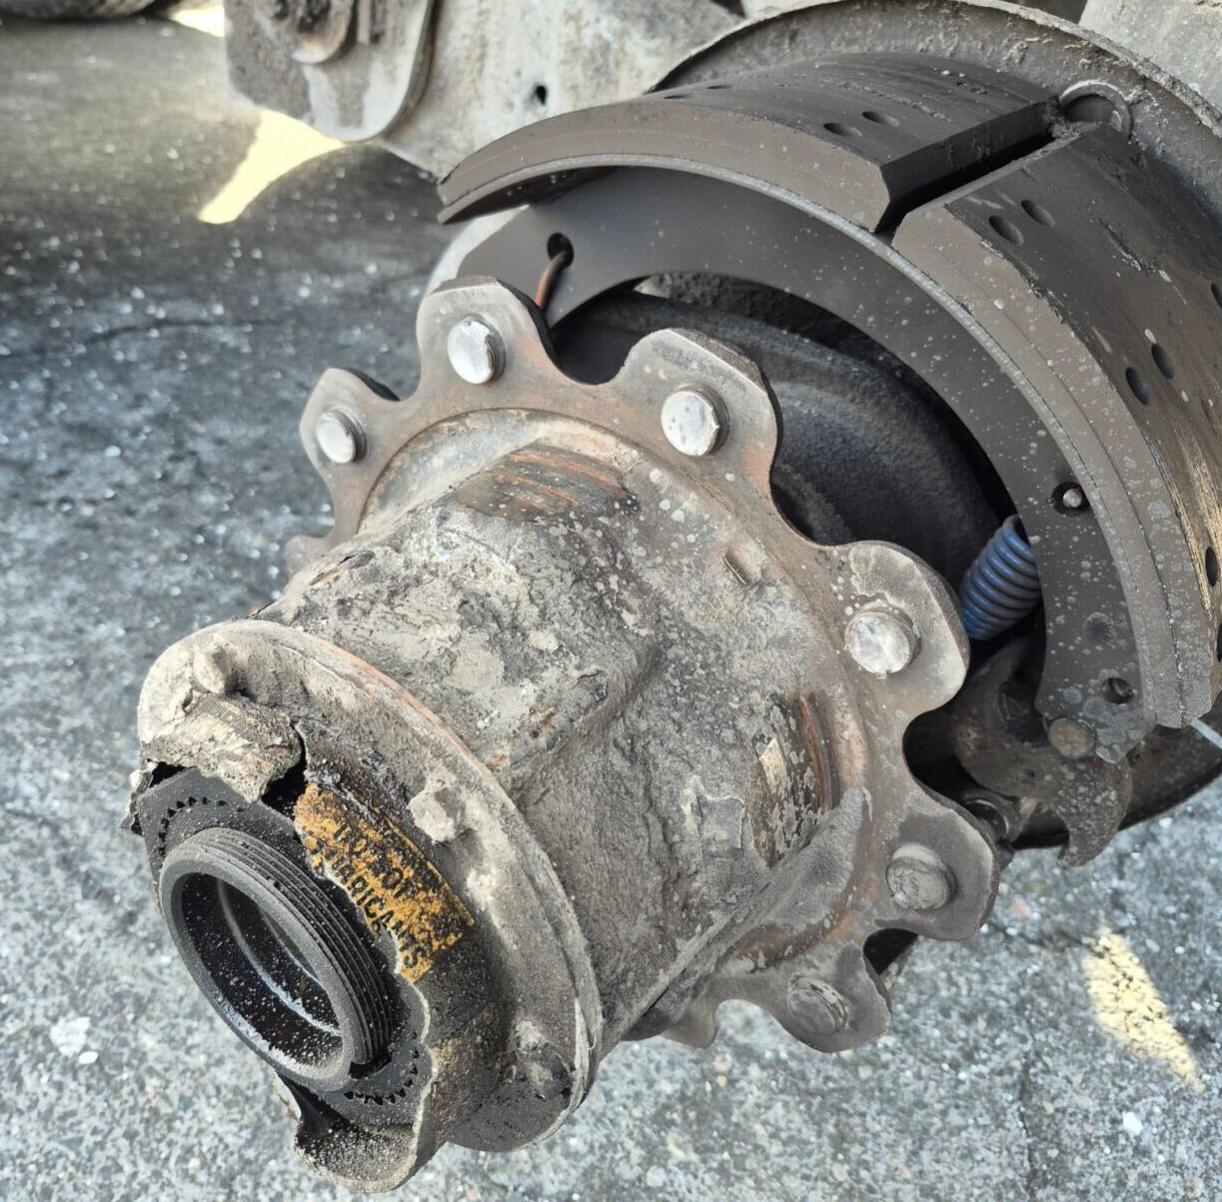
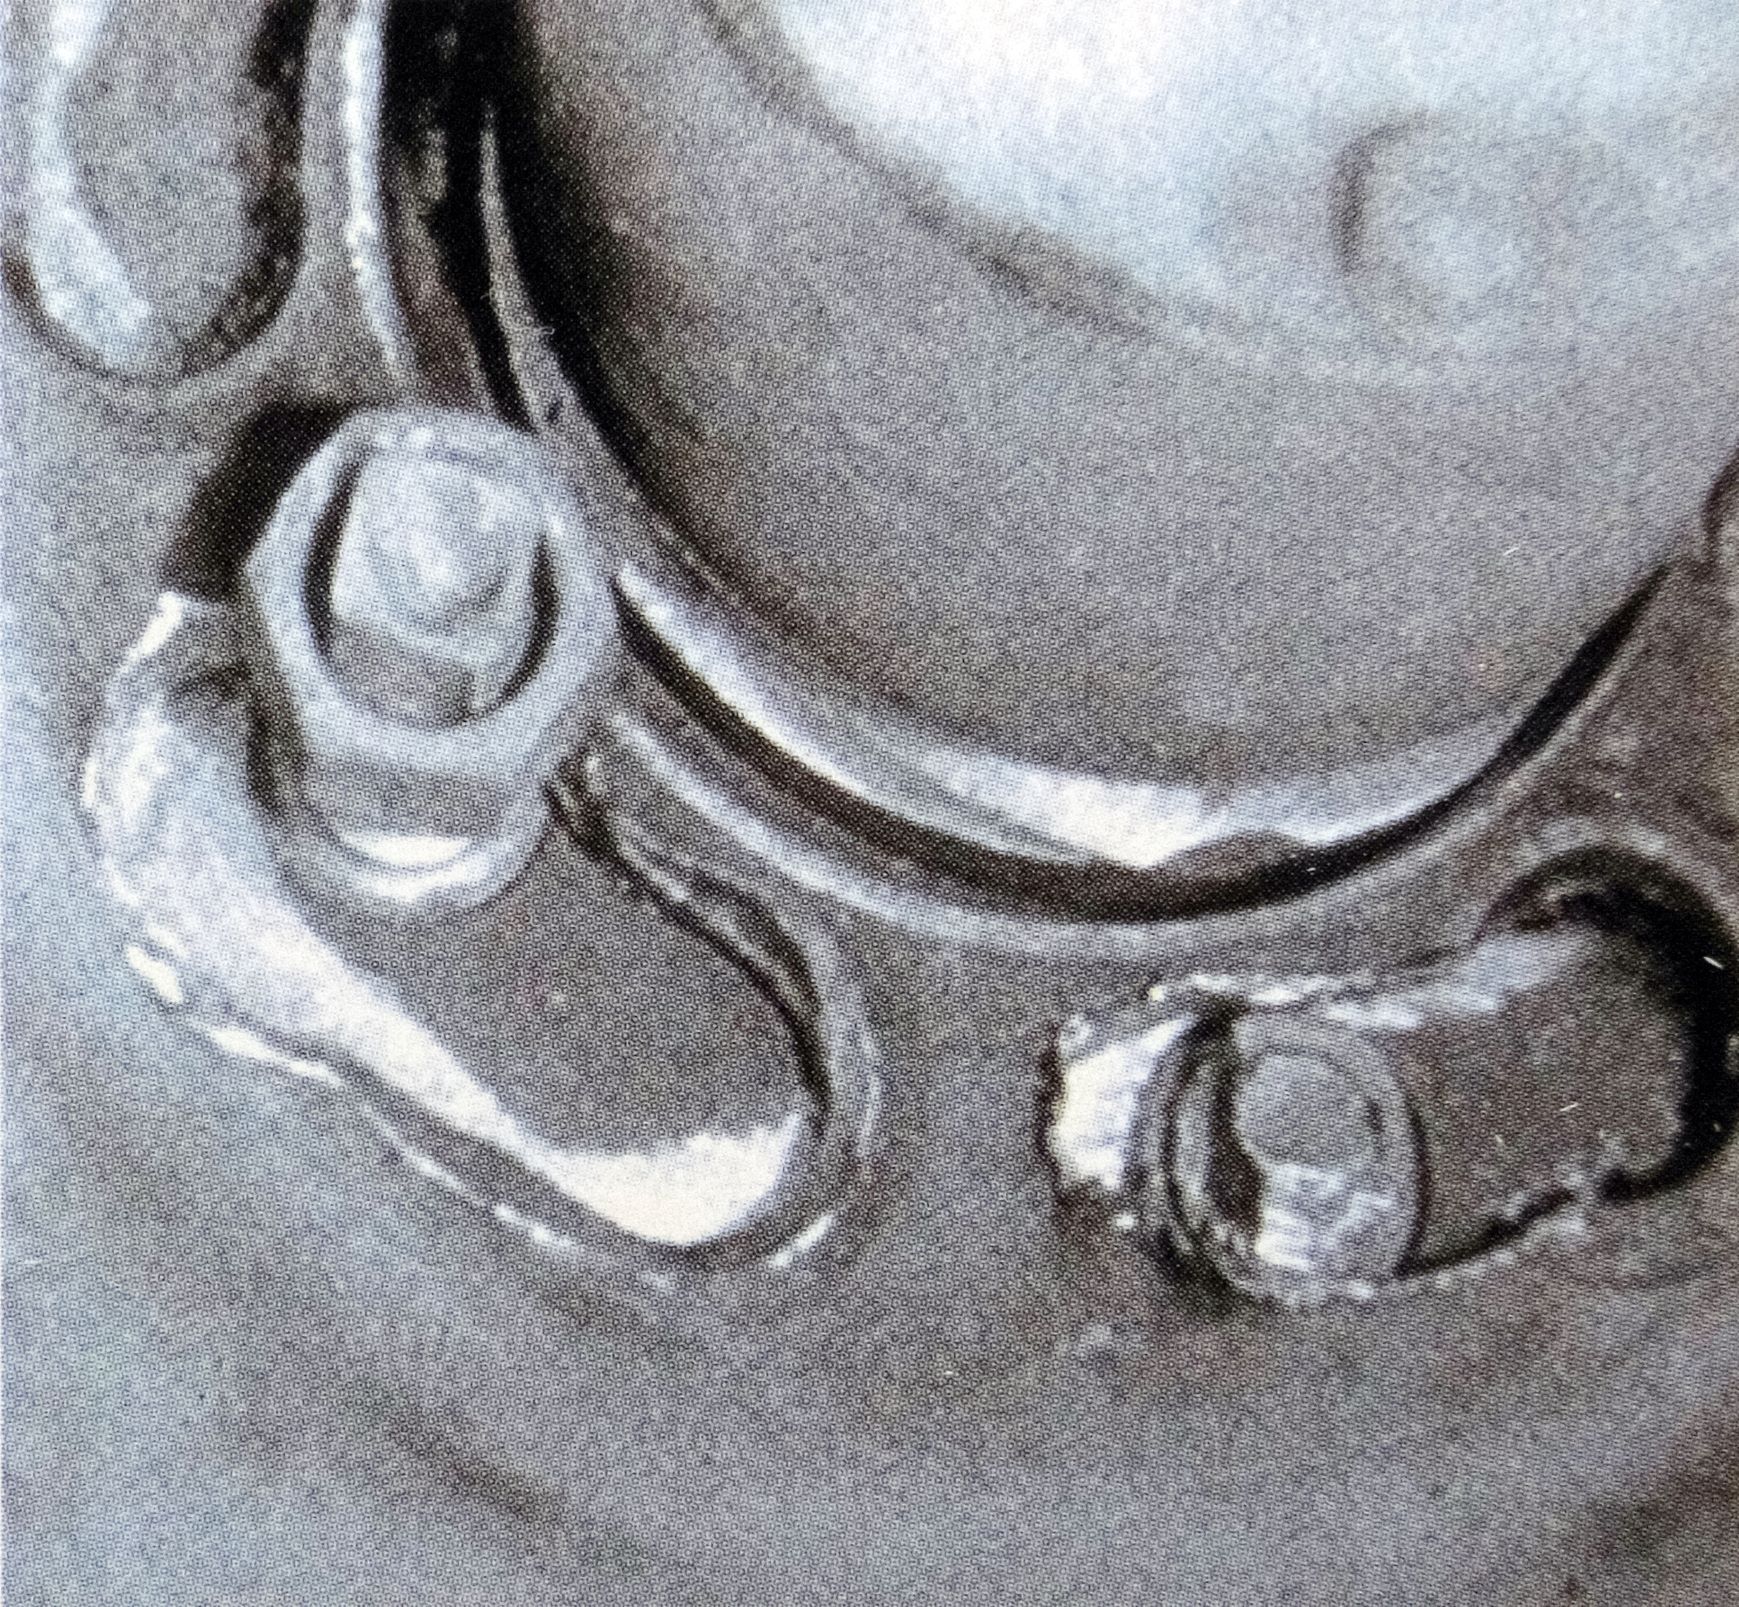
Several fastener-related failure modes are associated with hub-piloted, 10-stud wheels — the disc wheel system used on most trucks and trailers today.
Fasteners come loose when flange nuts are not tightened to the correct torque during installation. Insufficient torque allows fasteners to loosen; excessive torque can stretch or damage studs, leading to fracture.
Failure can also occur when nuts are torqued correctly but the wheel-face and hub mating surfaces were not properly cleaned. Rust, flaked paint, or debris trapped between mating surfaces interferes with proper seating.
Reusing damaged studs or flange nuts or failing to clean and lubricate threads and nut flanges, can produce inaccurate torque readings and inadequate clamping force.
Wheel manufacturers’ recommended torque values — typically 450–500 lb.-ft. — assume the correct components are used and are in good condition. That torque produces the clamping force required to hold the wheel securely in place.
Undertorquing is an obvious risk. Overtorquing is equally dangerous.
A one-inch impact wrench applied for just two seconds can generate torque exceeding 700 lb.-ft. — well beyond design limits. That force can stretch studs beyond their elastic range.
Likewise, applying correct torque to cheap or non-compliant knock-off studs is just as hazardous. Inferior studs may be unable to withstand the specified load and can stretch or fracture under normal torque.
Why do bearings fail?
The two primary causes of bearing failure are lack of lubrication and improper installation.
Insufficient lubricant leads to metal-on-metal contact between the axle, bearing, and hub. Friction and heat eventually destroy the bearing, often damaging the hub and allowing it to come off the axle.
With multiple hub and bearing systems on the market, technicians must follow the correct procedure for the specific system they are servicing. Newer LMS and Pre-Set systems differ significantly from older designs. Installation methods are not a matter of technician preference. Procedures exist for a reason.
Proper bearing end play is critical. Bearings set too loose can wobble on the spindle, damaging oil seals and allowing lubricant to escape. Bearings set too tight can bind, overheat, and fail even when adequately lubricated.
Tips for fleet maintenance managers
Bearing failures account for relatively few wheel separations, and post-separation damage is often so extensive investigators cannot determine the precise cause.
Evidence in the MTO report points primarily to two factors: lubricant loss, often from oil seals damaged during installation; and bearing damage caused by previous overheating. Both point to improper installation.
Regardless of method, the final bearing adjustment should be verified with a dial indicator. Industry sources consistently report this step is frequently skipped, despite being among the most critical.
Bearing manufacturers recommend accurate, repeatable installation procedures to ensure consistency across a fleet. Does your operation have a prescribed procedure? Are technicians following manufacturer instructions?
For fleets unsure where to start, consult the maker of your particular brand of wheel-end system, of check out the Technology and Maintenance Council’s “Recommended Practice RP 618A, Wheel Bearing Adjustment Procedures.” It addresses variations among manufacturers and provides guidance for manual bearing adjustment.
In Ontario, only technicians certified under the Commercial Vehicle Wheel Service program are legally permitted to install wheels on heavy trucks. Elsewhere in North America, anyone in the shop can do the job.
But should they?
Wheel manufacturers such as Alcoa and Accuride publish detailed service manuals that cover all the necessary steps, including inspection of studs and flange nuts, cleaning and lubricating fasteners, correct stud pretension, and torquing with a calibrated wrench. Pro tip: tighter is not better.
You don’t want amateurs messing around with your wheel-ends.
After wheel-end service, vehicles should be tagged to alert drivers to monitor wheels closely for signs of looseness.
Then there’s the inconvenient issue of retorquing wheels 50–100 miles (80-160 km) after service. The purpose is to confirm fasteners have retained clamp load after settling.
There is an important caveat: if the wheel was installed correctly — clean surfaces, proper lubrication, correct torque — retorquing should not be necessary. If it wasn’t installed by the book, torque loss is likely.
Given the impracticality of arranging a retorque enroute, the U.S. Tire Industry Association and TMC now advocate “torque checks” immediately after wheel service.
They recommend driving five to 10 (eight to 16 km) miles through tight turns or uneven surfaces, or performing figure-eight maneuvers. Afterward, torque is checked and restored if necessary.
At minimum, this ensures clamp load is maintained while the vehicle is still under shop control while avoiding the hunt for a tire shop at two in the morning.
It’s worth noting that torque verification is a required element of every annual commercial vehicle inspection.
The drivers’ role in preventing wheel-offs
Drivers have little influence or control over vehicle maintenance, but National Safety Code Standard 13 – Trip Inspections and provincial statutes derived from it hold drivers accountable for vehicle condition.
At least two drivers (that we are aware of) are currently serving prison sentences for criminal negligence causing death related to wheel separation incidents.
Once you take the truck onto the road, you are accountable for undocumented defects an inspector might find — including missing wheels.
One recurring issue with license mill driving schools is scripted vehicle inspections. Students may pass exams without understanding what defects actually look like.
Fleets serious about safety ensure drivers are properly trained and supported. Mike Gomes, vice president of maintenance at Bison Transport, says his drivers receive extensive onboarding that includes maintenance awareness. Bison also publishes searchable electronic and printed driver guides covering inspection procedures.
“There is a constant effort to provide training, updates, and support so operators can spot and report potential defects,” Gomes told trucknews.com.
Wheel-end inspections
Fortunately (or unfortunately) most imminent wheel separations present visible warning signs. Failing to notice these signs through ignorance or laziness shifts at least some responsibility squarely onto the driver.
Signs of potential bearing failure:
- Oil streaks on inner tire sidewalls or puddles of oil indicate seal leaks and lubricant loss.
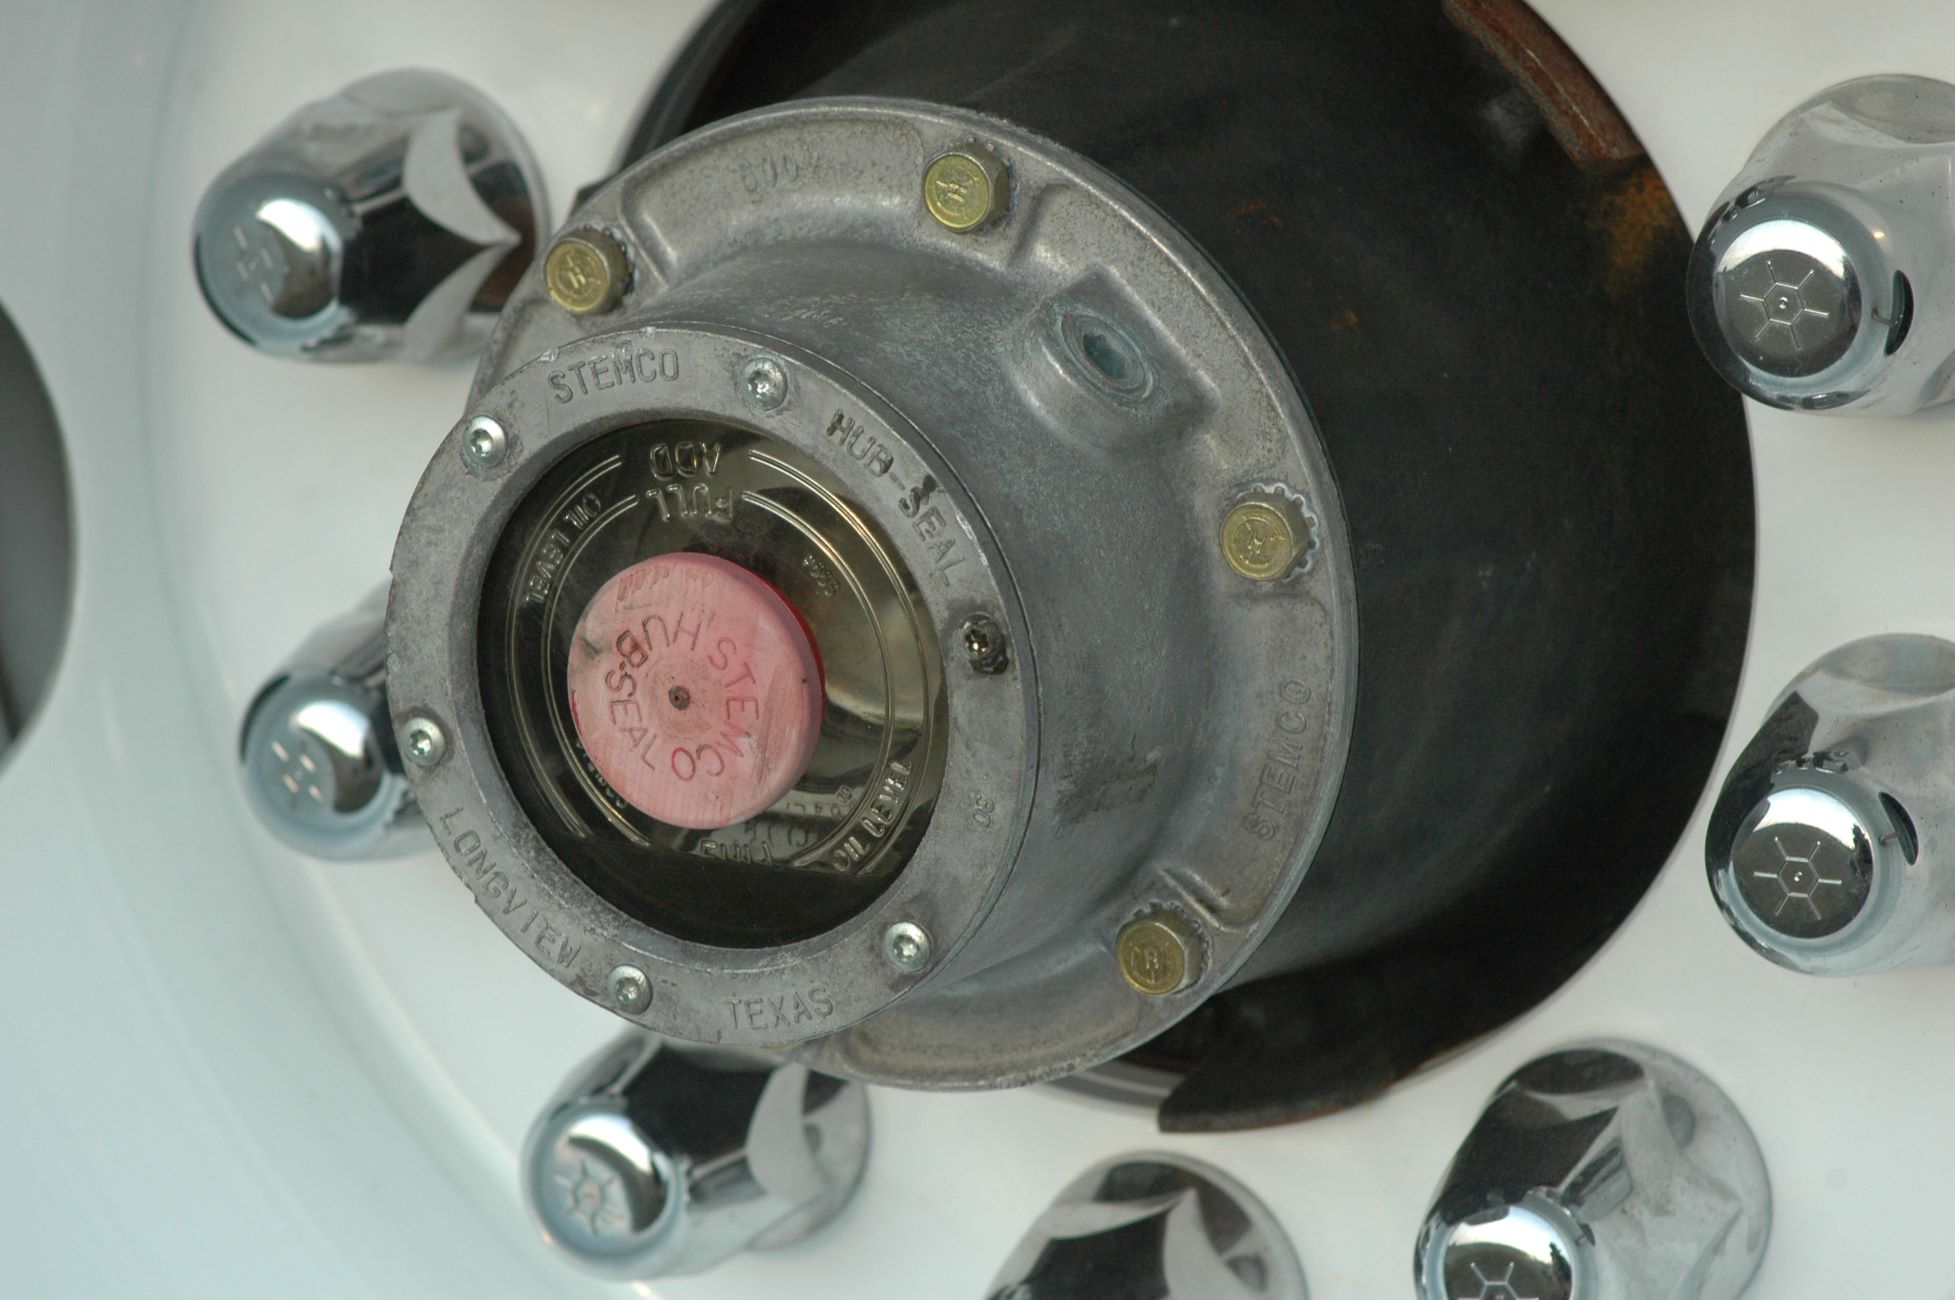
- Many hub caps have a sight glass to verify prober lubricant level in the hub. Clean it if necessary and check the level. It should be slightly below the filler hole. If the sight glass is broken, or if you can’t see the lube level, have maintenance look at it.
- Periodically check the inner tire sidewalls for signs of oil leaks and carefully touch the hubs to gauge temperature. They should be warm after a couple of hours of driving. Hot hubs are a warning sign. Hubs may also be hot due to recent heavy brake usage. Smoking wheels are an immediate danger signal.
Signs of potential wheel or fastener failure:
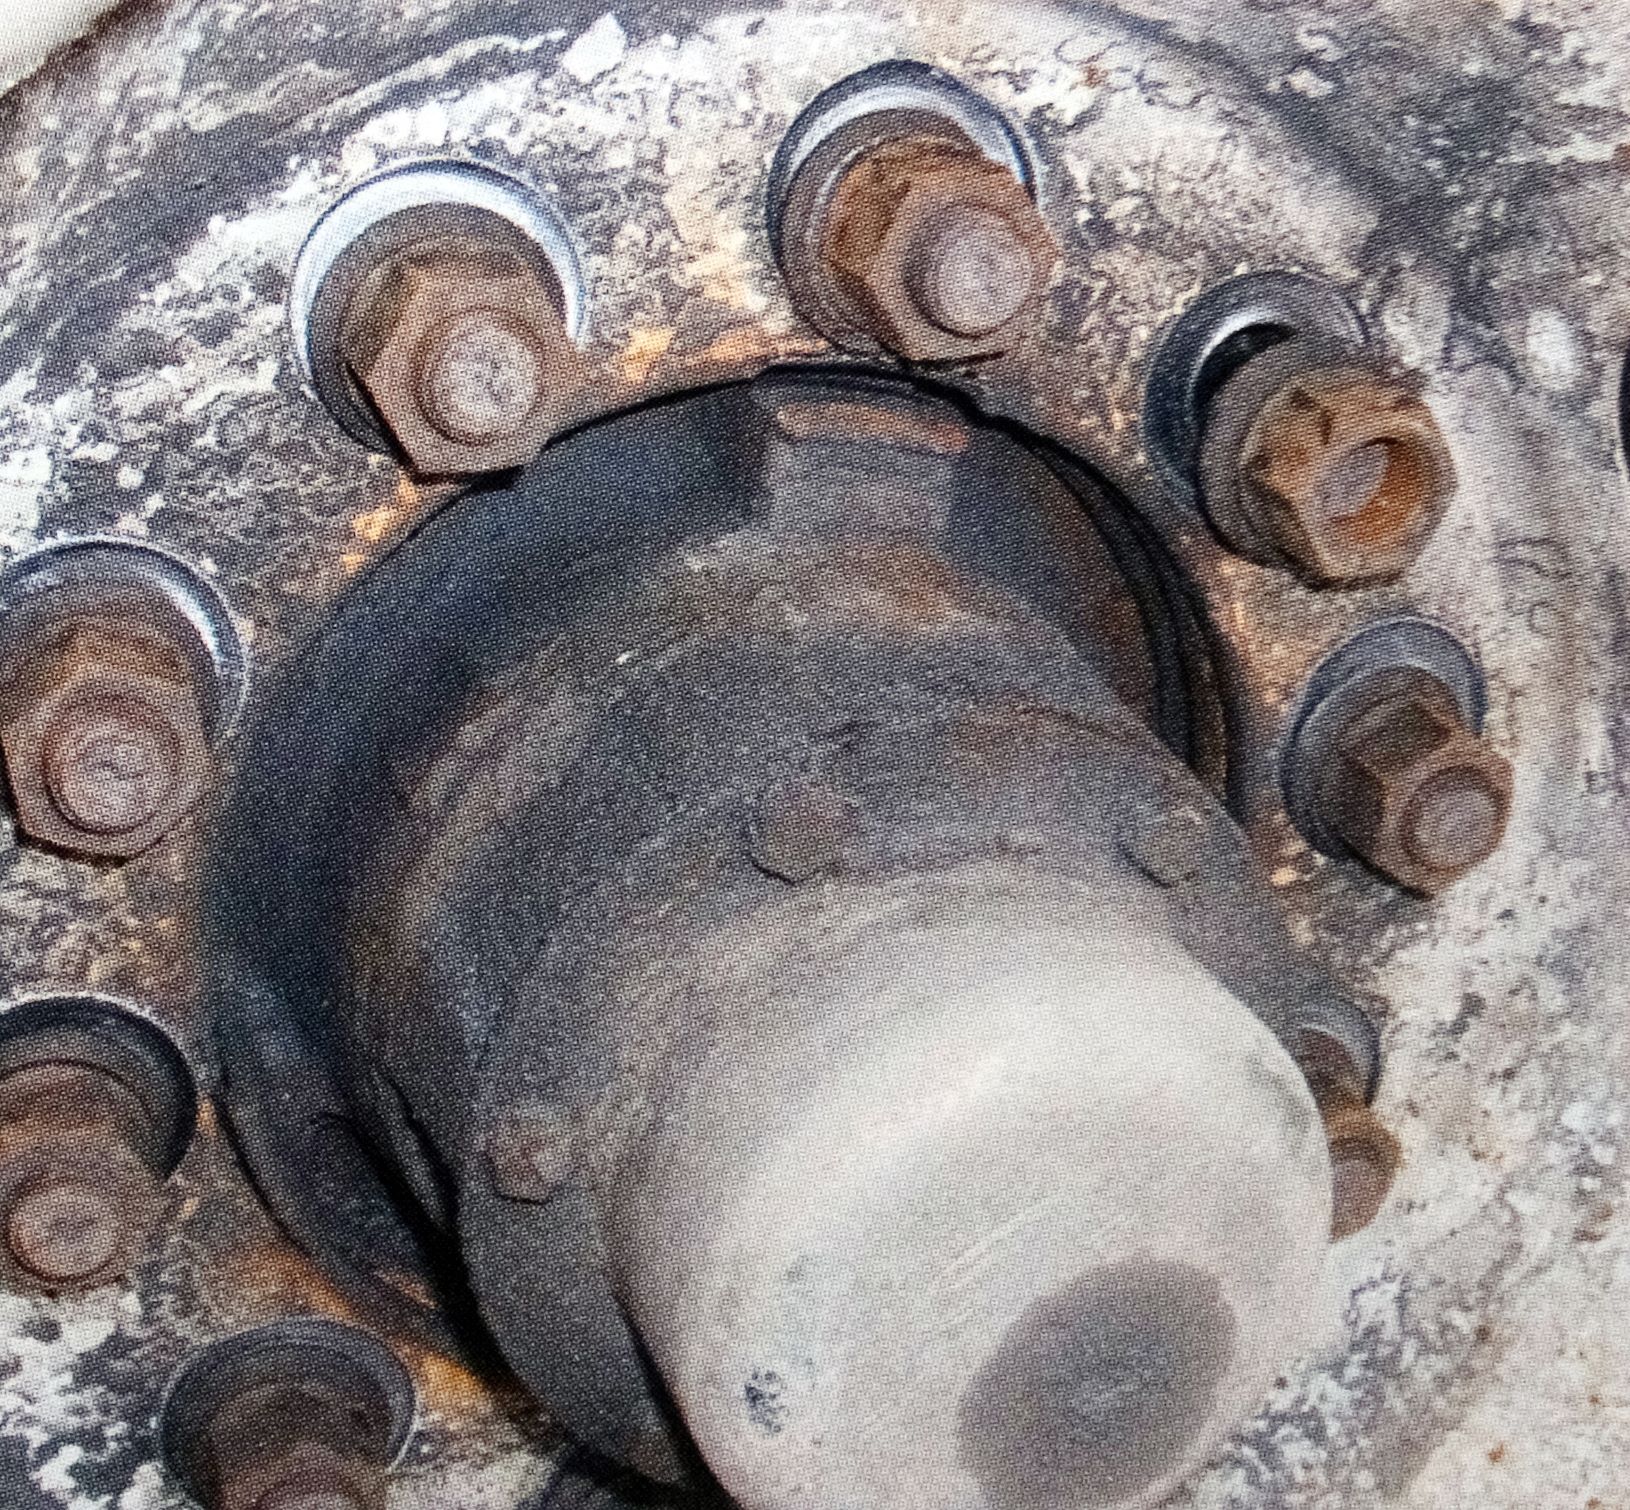
- Forget trying to twist the nut with gloved hands. If the nut has only a few foot-pounds of torque on it, you will not be able to twist it without a wrench.
- If the nuts are loose, chances are you will see shiny bare metal surfaces around the edges of the nut flange. There may also be gaps between the face of the flange and the wheel.
- Look for elongated or egg-shaped stud holes on the wheel. This indicates the nuts are already loose and may be prevented from backing right off by corrosion on the studs. This is caused by the wheel “slipping” under the fasteners.
- Veteran driver and driver trainer, Mike Paolozzi, suggests tapping the nuts gently with a small hammer. A tight nut will make a “thunk” sound, while a loose nut will make a metallic ringing sound.
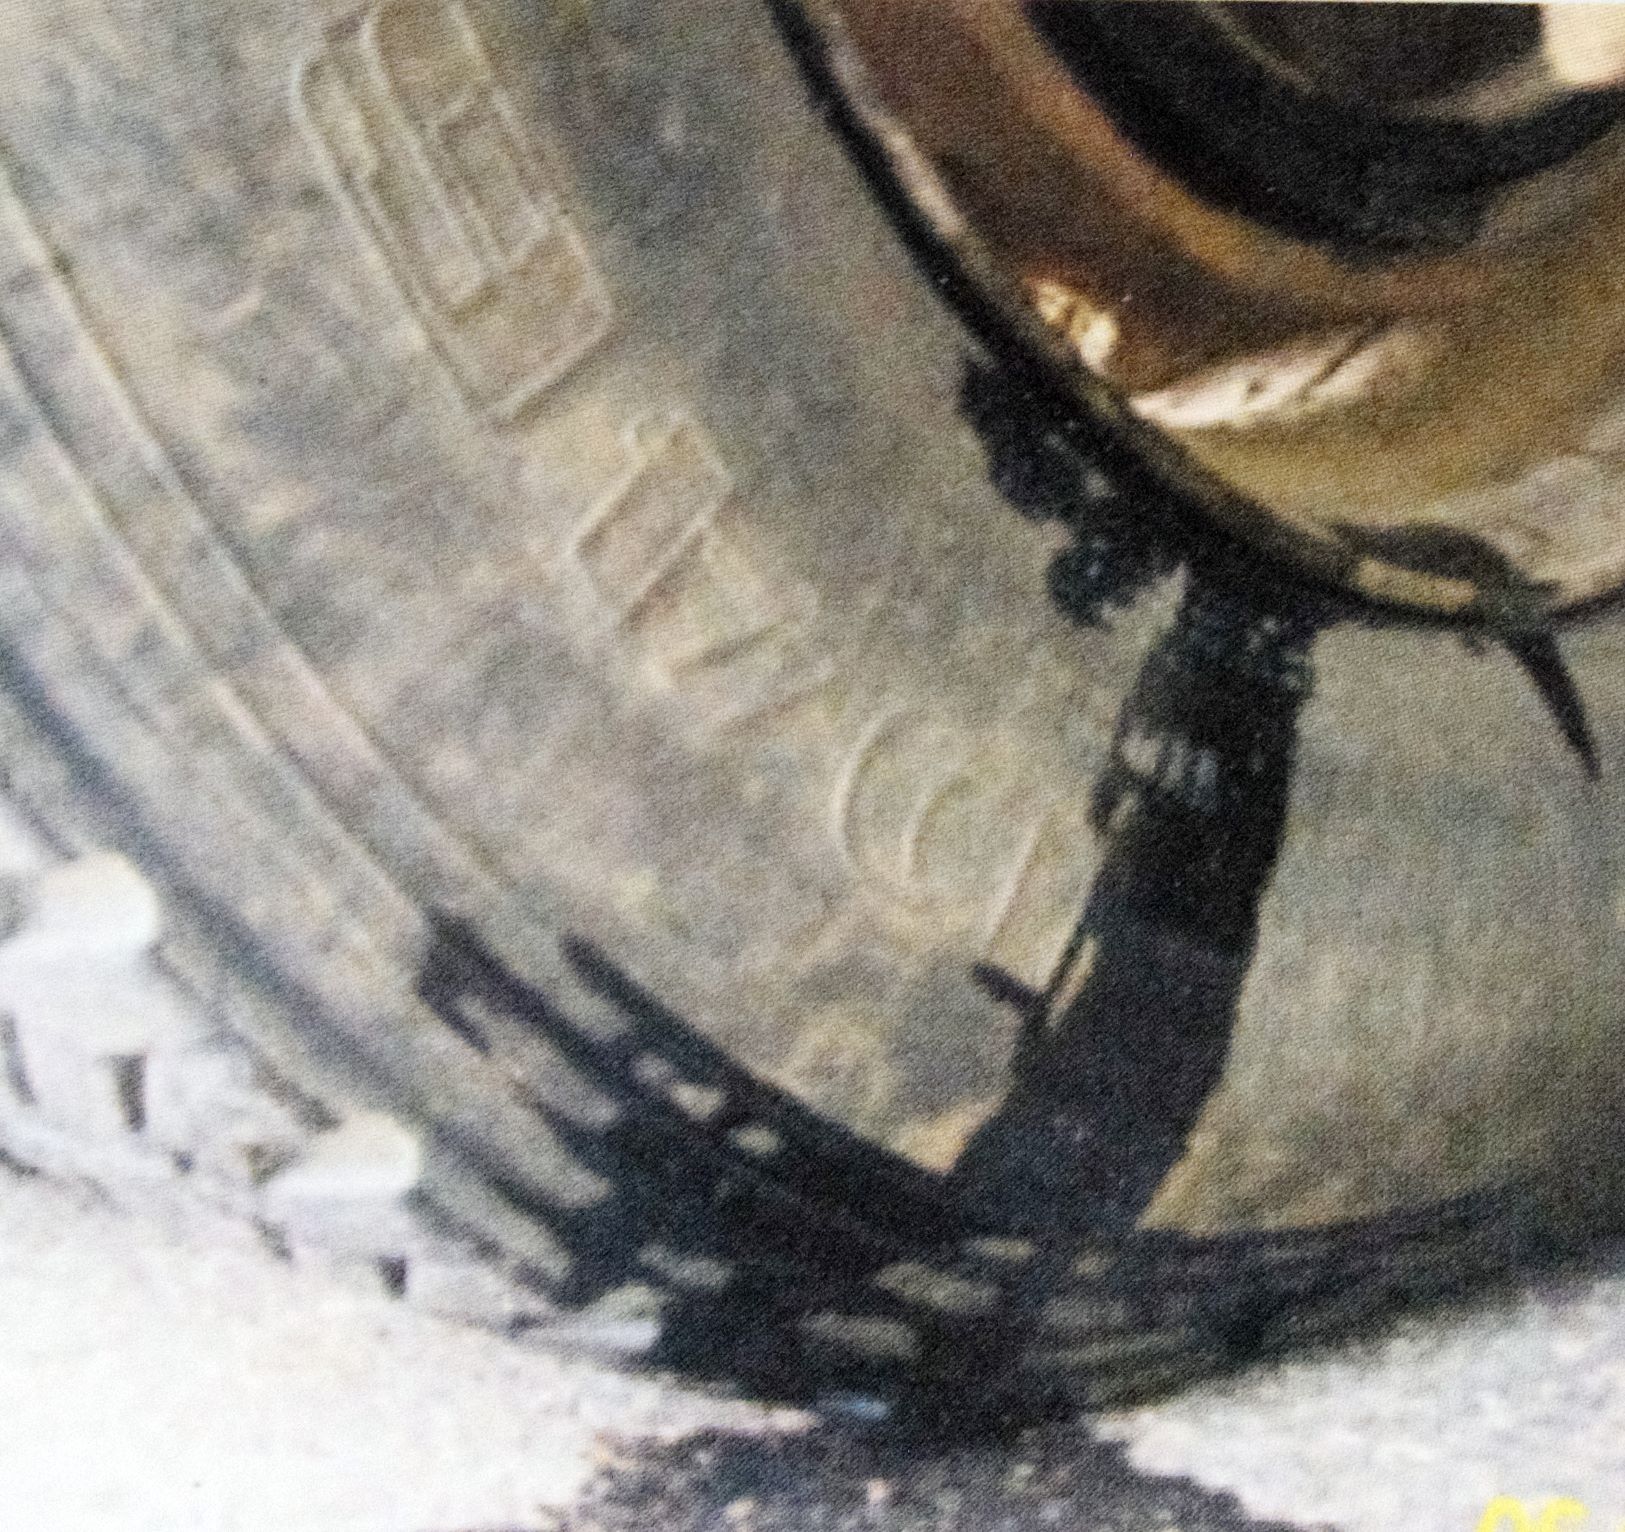
- Rust streaks radiating outward from the studs may indicate past or present loosening. Have the shop check it before signing off on it.
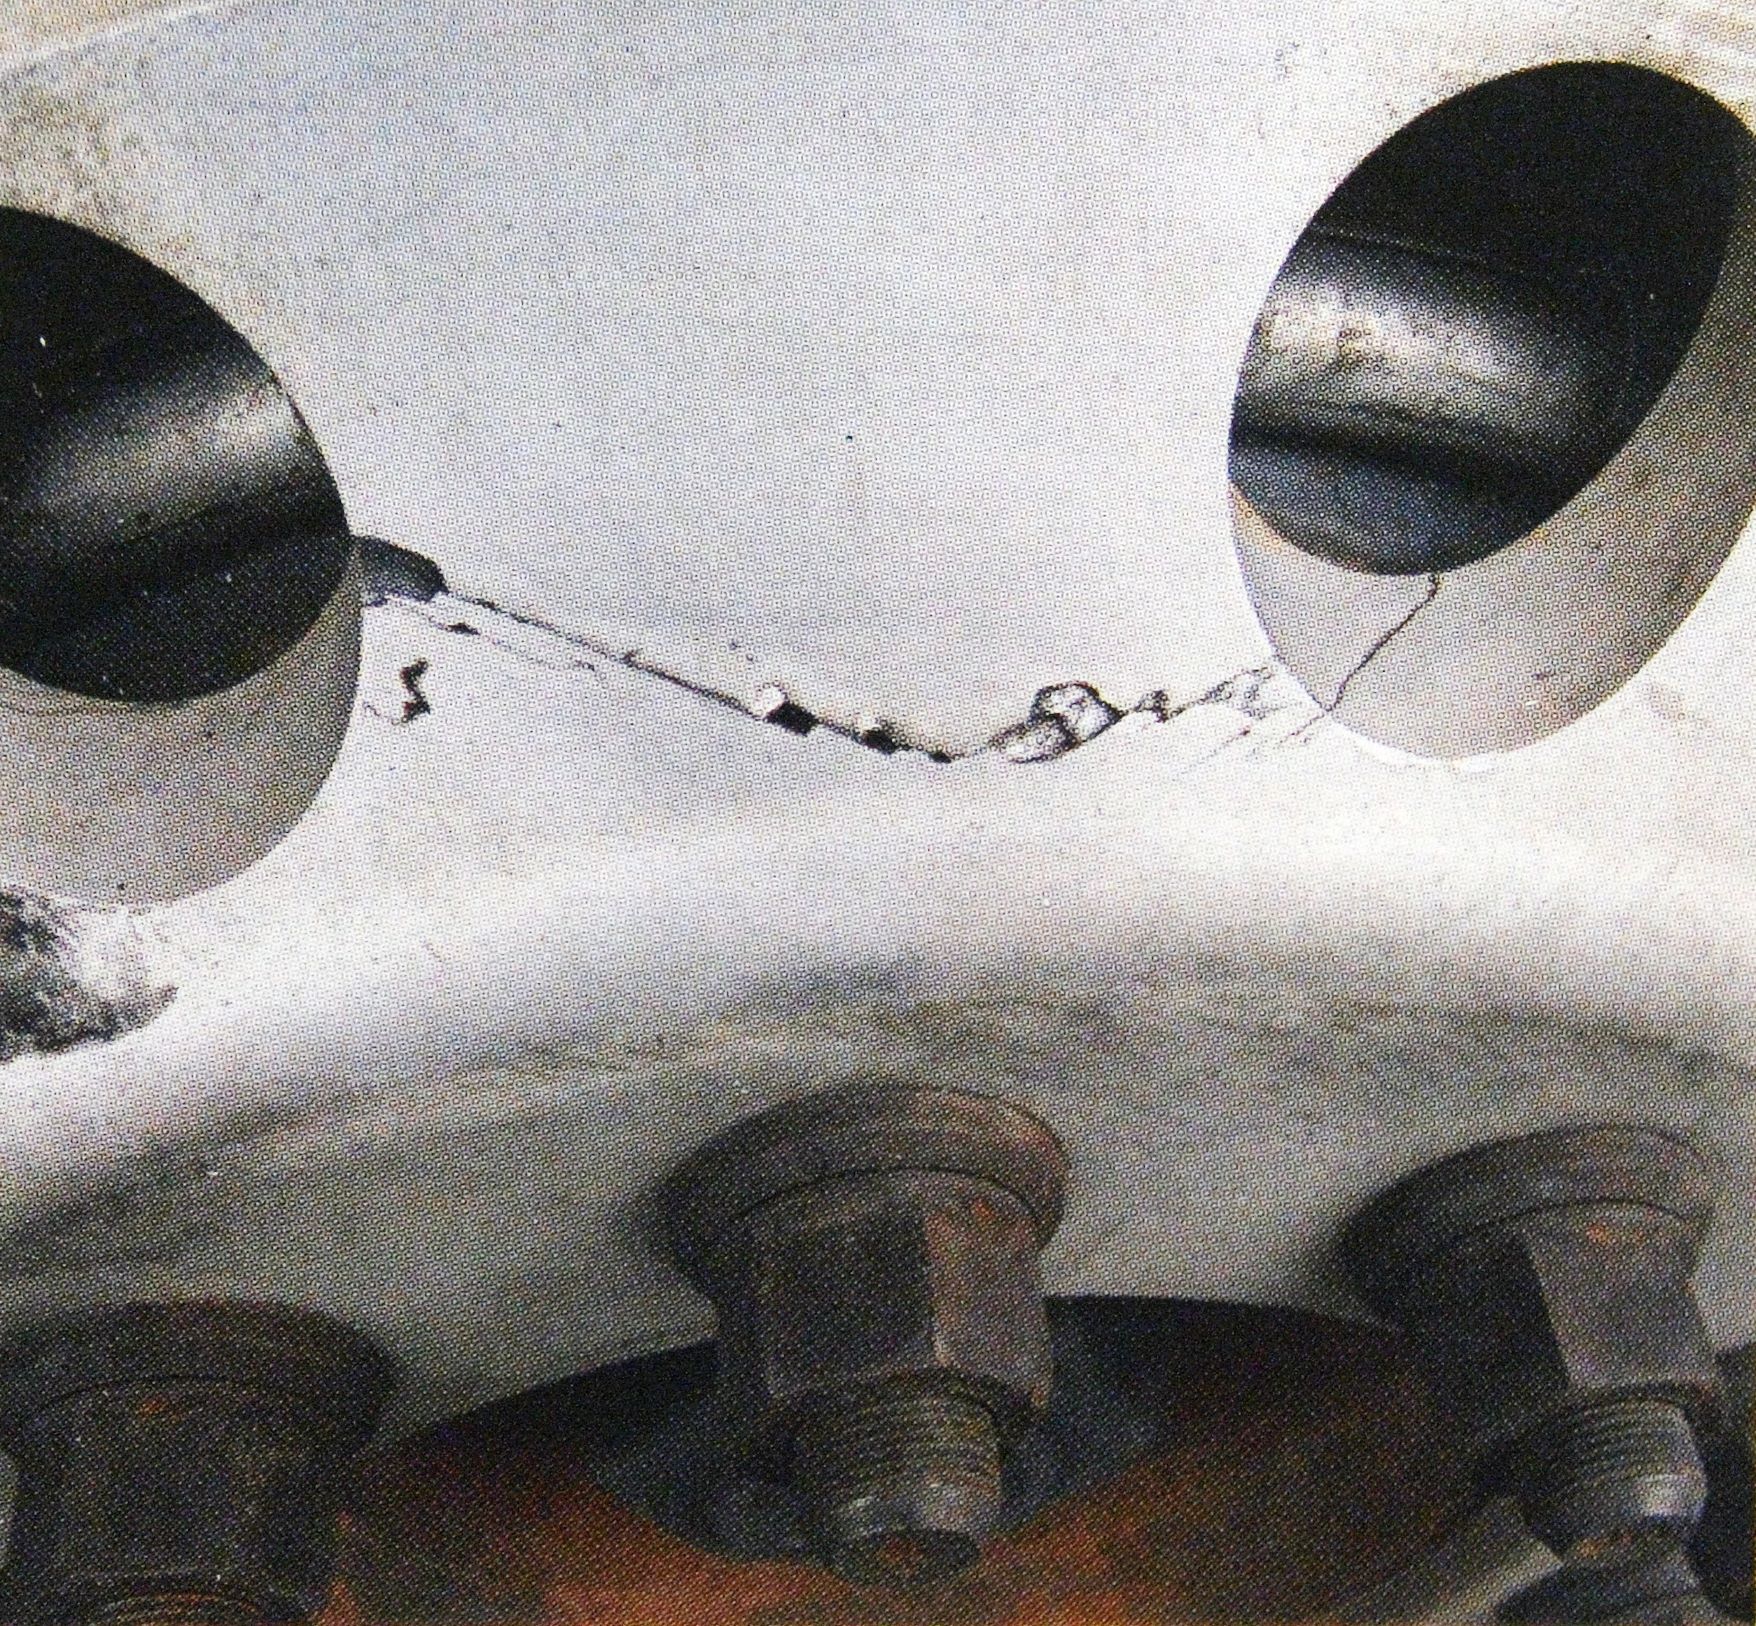
- Cracked wheels, though rare, do occur. Look for thin lines in the metal on aluminum wheels, often running from stud-hole to stud-hole, or from the hand-hold holes in the wheel. On painted steel wheels, the crack may be a crack in the paint. If you’re unsure, have the shop look at it.
That’s a lot to cover in a 15-minute inspection. But once the vehicle is on the road, the driver is responsible.
If that feels unfair, consider the two drivers currently rotting in their jail cells.
Assuming you’ve done a diligent vehicle inspection, your safest bet is to document the inspections with photos. If something happens later, police will look for proof the inspection was actually done. Undocumented defects will likely result in charges.
Sorry. Sometimes it really does suck to be a driver.
One final reminder: Retorquing wheels 10 to 100 miles (16 to 160 km) after service remains critically important and is among the least observed procedures. If you’re aware of recent wheel-end work, insist torque checks be completed before leaving the yard or discuss with your manager where to have the work done.
Lug nut indicators
A significant number of fleets have installed brightly colored plastic tabs on their wheel nuts as a way of indicating a potentially loosening fastener. Some fleets swear by them, while others see them as providing a false sense of security, or even a distraction to drivers.
Bison Transport uses a brand that claims to lock the fastener in place, and Gomes says they work. “These provide the driver with a visual clue if any of the wheel nuts are loose,” he said, adding, “we have been successful in identifying potential issues in the past with the use of these locks.”
Have your say
This is a moderated forum. Comments will no longer be published unless they are accompanied by a first and last name and a verifiable email address. (Today's Trucking will not publish or share the email address.) Profane language and content deemed to be libelous, racist, or threatening in nature will not be published under any circumstances.
-
Allan, this just demonstrates a wheel-separation can happen to anybody
Hi Jim-worked as fleet manager-driver instructor-taught brake theory-commercial accident investigator – driver from 1961 to present. All those years no challenges like the past 30 years, operating equipment today with trucks that rival cars in the simple operation. These unskilled people should never been given a license in the first place as those young boys from Humbolt would agree if live today! How did Ontario become so out of control issuing driver licenses? Thanks JohnWihksen
Like you said, if a wheel is PROPERLY installed, it is not going to “loosen” and come off. By properly, I mean all the components were cleaned, inspected, and lubed as necessary. That is followed up with proper torque on the fasteners. Installers should have proper training on such an important job. If a mechanic does not tighten the oil pan plug properly, his employer can lose an engine. If a wheel comes off, someone can lose their life. Let’s be realistic on re-torques. In the ‘old days’, we would give the drivers the wrench and hex bar. Drivers would tell each other to tighten the nuts (Dayton) until it squeaks. We have come a long way. Hammer checking the nuts? I think a nut would have to be quite loose for most people to think it was loose. Get the plastic indicaters. The driver can visually see if any nuts are loosening long before the holes start elonging. On bearings – Why are people still using oil to lubricate bearings? Use synthetic grease and you are done with changing wheels seals and ‘good’ brake shoes. (Except on truck drive axles)
Reply from the UK.
My company Parma Group is a specialist supplier of wheel security devices such as the ones described here and several other options. One of our most successful products is imported from Canada and may be the one used by Bison Transport as quoted.
In short, wheel security is entirely preventable given proper and sound maintenance practices backed up with effective security devices. It is long overdue for wheel-off instances to be confined to the history books.
Great article on the importance of proper wheel end maintenance and inspection !
Great article Jim, thank you for the mention.
One thing I always look for when wheels are installed is for the wheel nut to slightly turn during the torque.
If the torque wrench clicks and the nut did not move you know immediately the nut was installed to tight.
When I did my own maintenance before certifications were mandatory, I used the torque wrench to tighten the nuts, never an impact. Never had any issues after that.
Isn’t it funny how when the MTO set the wheel off rules in place, as they wete announcing it, that very time the first reported occurance was a MTO dump truck which had a wheel off happen.