How to complete truck electrical repairs
Electrics is one aspect of truck repair where a little bit of knowledge can be more harmful than helpful. Electrical troubles don’t always present in a way that intuitively leads to the root of the problem. Because of the complex nature of modern electrical and electronic systems, unskilled, lazy, or even over-confidant technicians can waste tons of time and money chasing ghosts or replacing perfectly good parts.
Some of Canada’s top fleets have learned from experience the true cost of improper diagnostics and repairs, and have implemented rigorous procedures and standards for electrical repairs. These provide clearly defined diagnostic steps to determine a problem, and they outline correct repair procedures. If nothing else, this bring some consistency to the process.
Many experienced technicians develop their own way of doing things over the years, of course. Bison Transport’s manager of technical training and product development, Tony DeGroot, calls it technician discretion. It’s not necessarily bad, he says, but sometimes a problem isn’t what it appears to be.
“Most good technicians understand troubleshooting and repair processes, but they don’t always follow them,” DeGroot says. “They can fall into the trap of saying, ‘I’ve seen that problem before, I know how to fix it,’ but without doing proper diagnostics, things can be overlooked.”
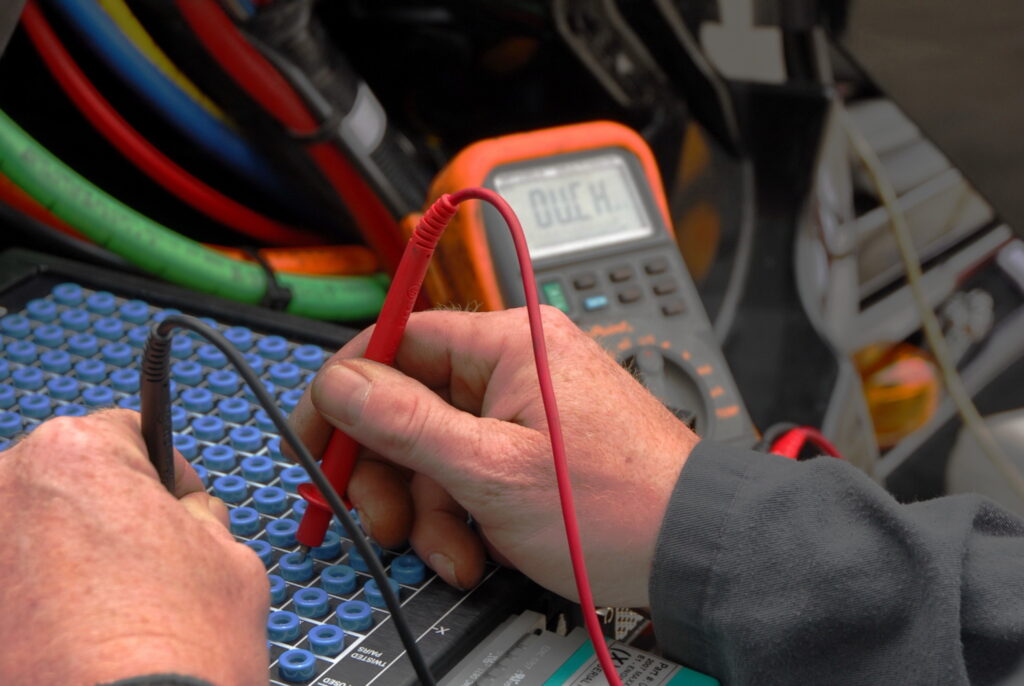
Even if a technician has done a certain repair a dozen times, there’s always a chance the problem is not what it appears to be. This is where process becomes important. DeGroot advises his technicians to start with basic elements of any circuit: the source, a switch or control, the load, and a ground.
“Start by determining whether you have no voltage at the light, for example, or a failed light,” he recommends. “Then work toward isolating the problem by breaking the circuit into smaller chunks.”
If the light is good, but there’s no power, check the fuse or the source of the power to ensure you have voltage there. If that’s good, check a connector at some midpoint in the circuit. If there’s power there, you know the failure is between that and the load. If there’s no power there, you know the problem is between the source and that connector.
Most good technicians understand troubleshooting and repair processes, but they don’t always follow them.”
– Toy DeGroot, Bison Transport
Experience has taught DeGroot that wiring problems are more likely to be rub-throughs than corroded connectors. He says tie straps used to secure the harnesses to the frame are usually pulled too tightly, or it may be the vibration alone, but there are usually telltale signs to look for when visually inspecting the harness.
“Just because the harness is still held in place, or it may look just barely rubbed, the insulation on the wire might be broken,” he says. “If it’s rubbed through, you’ve now got an access point for moisture and salt, and that’s how corrosion starts.”
Tiedown points are likely locations for wiring failures, but wires are known to break inside the covering due to movement and vibration. Visually, you can inspect for long runs of unsupported wire or wires attached to moving components such as axles, or wheel ends. But before you start pulling apart harness and wiring loom, narrow the search by opening a connector, if possible, checking for power at that point in the circuit, as describe above.
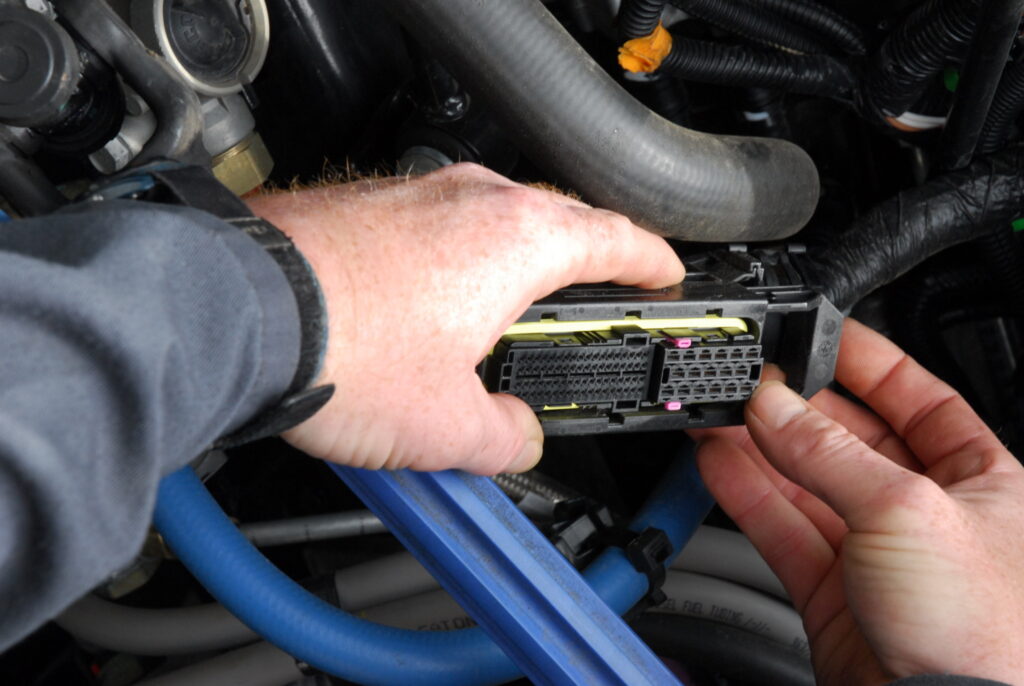
Caution with connectors
Connectors are designed to be opened, but go easy on them. Don’t pull them apart by yanking on the wire because that can damage the integrity of the connection. Avoid damaging the seal, and always squirt a little dielectric grease into the connector when reassembling it. Bison uses Krown T-40 rust protectant on all electrical connections.
According to an electrical maintenance and repair expert at Erb International who was shy about having his name mentioned in this story, the biggest risk to the connector is damage from probing the terminals with the incorrect tool.
“Technicians will sometimes force a multimeter probe or even the end of a bare wire into the connector, spreading the terminal to the point where they become loose,” he warns. “A loose connection can create an intermittent point of high resistance, which creates heat. This will amplify the problem as the hot terminal will expand and [further compromise] the contact.”
He recommends doing a Pin Drag Test after reassembling the connector to ensure it’s tight.
“Feel for drag when reconnecting the two ends of the connector,” he suggests. “If no drag is felt, the terminal in the connector is likely spread. The drag test can be done while measuring voltages at connectors for other reasons.”
The Wiggle Test is useful for identifying loose connector pins and wiring connections in general. After attaching a voltage measuring device, gently wiggle or shake the connector while observing the display. If the voltage does not remain constant while the connector is manually manipulated, there’s probably a loose pin in there,” Erb’s expert says. “This can help in narrowing down an individual section of harness [that may be faulty].”
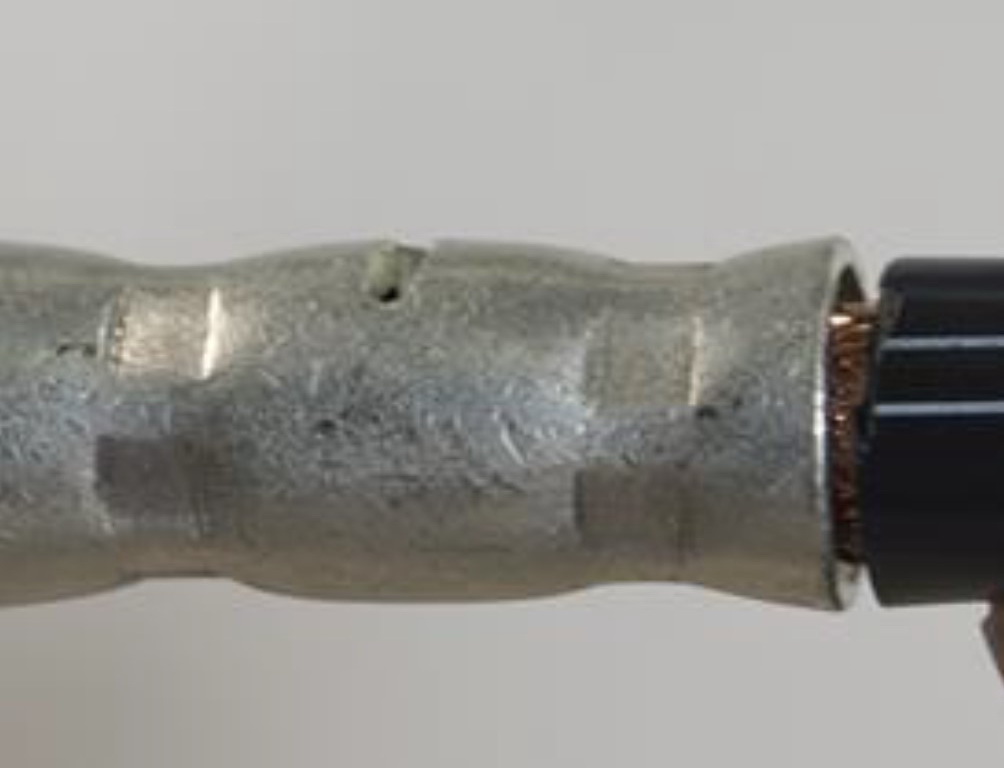
Proper wiring splices
When it comes to wiring repairs, proper splicing technique is the key to long-lasting repair. Erb International’s corporate fleet director, Jim Pinder, says poor wiring repairs are a constant source of frustration.
“An inadequate previous repair will fail again, but what makes it worse is the tech repairing the problem first has figure out what the previous tech did with the repair,” he says. “Since the original repair didn’t solve the problem, now you’ve got two problems.”
Bison’s DeGroot shared with us a manual of sorts he issues to all Bison technicians involved in electrical repairs. It outlines exactly how the company wants wiring repaired, what tools to use, and how to do the repair properly. He allowed us to use a few paraphrased excerpts here:
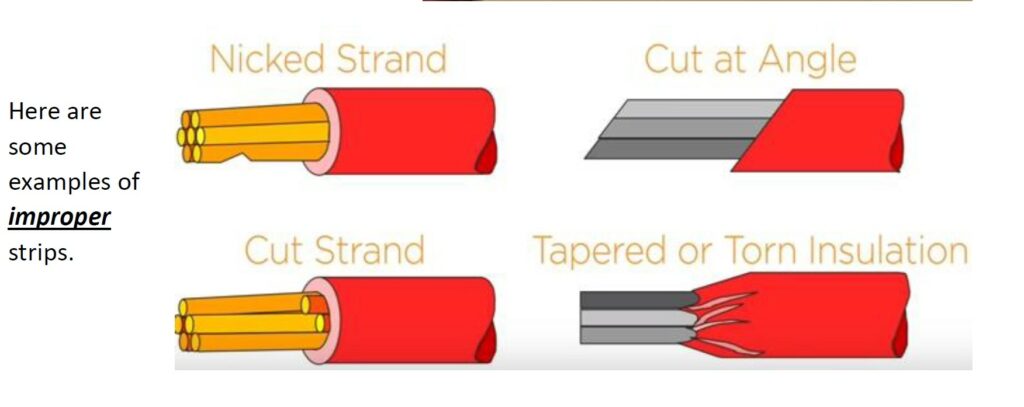
- Using the proper tool for cutting (cable cutters, side cutters or linesman pliers), cut the wire at a 90-degree angle. And using a proper stripping tool, not pliers or your teeth, strip just enough insulation from the wire to fit into the butt connector, about 3/16 to 3/8 inch. Avoid niching or cutting strand of wire while stripping.
- Before crimping any butt connector, ensure the copper is clean and bright. If the copper wire is oxidized (black), keep moving back until you find clean, bright copper.
- Always use the correct wire gauge for repair and try to use wire that’s the same color as the original.
- When splicing a group of wires in one area, ensure the joints are staggered.
Completing the repair by crimping the connection is critical to its durability and resistance to moisture ingress (corrosion). Bison Transport uses only clear, adhesive-lined heat shrink tubing for the best seal and so the connection can be checked for signs of corrosion in the future.
- Slip a piece of heat shrink onto the wire before attaching the terminal to it. Insert wire into the butt connector but leave tiny gap between the butt connector and the wire insulation.
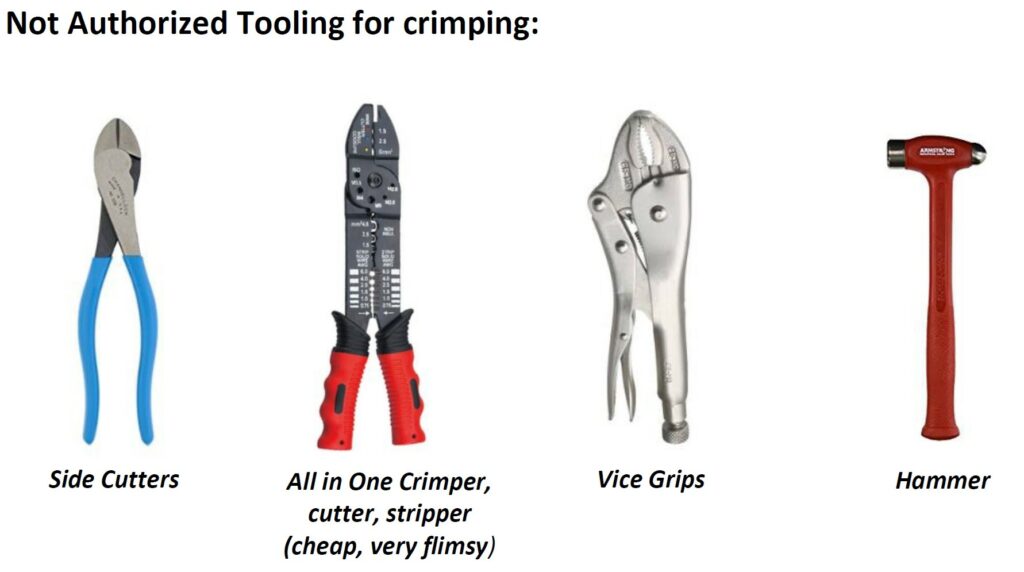
- Crimp the connector using an authorized tool, and then do a tug test to ensure a tight connection.
- Choose the correct size of heat shrink for the size of wire/butt connector you are using. Too large a diameter and it will not shrink enough. If the diameter is too small, it will be hard to install and may crack open when heated.
- Cut the heat shrink to the proper size. it must have a half-inch overlap on the wire insulation. For example, if splice length is half an inch, then the total length of heat shrink should be a minimum 1.5 inches.
- Use the appropriate tool to warm the shrink tubing. Don’t overheat or melt the heat shrink as this will cause issues later on. Method 1: start at one end and slowly work your way to the other end while rotating the wire or the tool to ensure the heat is evenly distributed. Method 2: start in the middle and slowly work your way to one end while rotating the wire or the tool to ensure the heat is evenly distributed, then go back to the middle and do the same for the opposite end.
- Ensure the adhesive has come out at each end.
- Tape up harness using Tesa Tape with a 50% overlap.
A final word of caution
Wiring in a modern truck carries more than just volts and amps to various components. Many of those wires also carry multiplexing signals with messages to and from various controllers on the truck. Multiplex communications and the sensors that produce them can be very sensitive to voltage and resistance.
Think of the wiring bundle that runs to the driver’s door. It may have a dozen wires in it, and it sometimes opens and closes dozens of times each day. With all that movement, it’s easy to see why something in that bundle might fail, warns Justin Horton, shop manager at Gateway Trailer Repairs in Edmonton.
“Multiplexing is based on voltages. It’s no longer just this wire doing this function. It responds to different voltages,” he says. “When you create resistance within a wire because it’s corroded or partially broken, strange things start to happen.”
Erb’s expert says using load-testing equipment to test the condition of a wire using battery-level voltage can damage sensitive electronics.
“Technician can simulate an electrical load on both the source and ground of the circuit, which is a great way to test for power sources that are connected to battery voltage. However, care should be taken when using it on voltage supplied by control modules, and under no circumstances should it be used on datalink wiring.”
That’s just one more thing to worry about, and all the more reason to ensure your electrical technicians are properly trained.
Have your say
This is a moderated forum. Comments will no longer be published unless they are accompanied by a first and last name and a verifiable email address. (Today's Trucking will not publish or share the email address.) Profane language and content deemed to be libelous, racist, or threatening in nature will not be published under any circumstances.
Great article Jim !
All techs at one point or another skip the basis checks and go for the “perceived” issue. You noted a few reasons why this may occur, however I believe a more prevalent cause is pressure on technician to expedite the repair. Given my believe this is a good read for all levels of distribution.